Welcome to One Brush Beauty

OBB Where all are welcome, i write reviews, answer questions, give tips and advice on how to use the makeup that you have. OBB is really about easy yet beautiful make up, making you feel your best, and what products are out there to help you do that.

TTFN
C x
Showing posts with label Illamasqua. Show all posts

Tuesday, 29 January 2013

How to...blue eyes pt 1

So if like me you are a bit of a trend spotter, you will have noticed the emergence of the blue eye. With models for Moshcino and Christian Dior donning the blue it is set to become a trend for the coming seasons.

But with this in mind...this look is so hard to pull off without looking a tad 80's...or like a school girl who has just raided her mums makeup bag for the first time. But this blue comeback is all about neon shades, all over coverage and being a bit too in your face. So just my look.

I have been experimenting with a few blue eye looks for you and this is a little 'how to' for those who like it that much they want to try it.
This is by far the most 'in your face' as I dare to go, but I will post up some more subtle looks at a later date for those who are interested (anyone??)

So...Here we go....
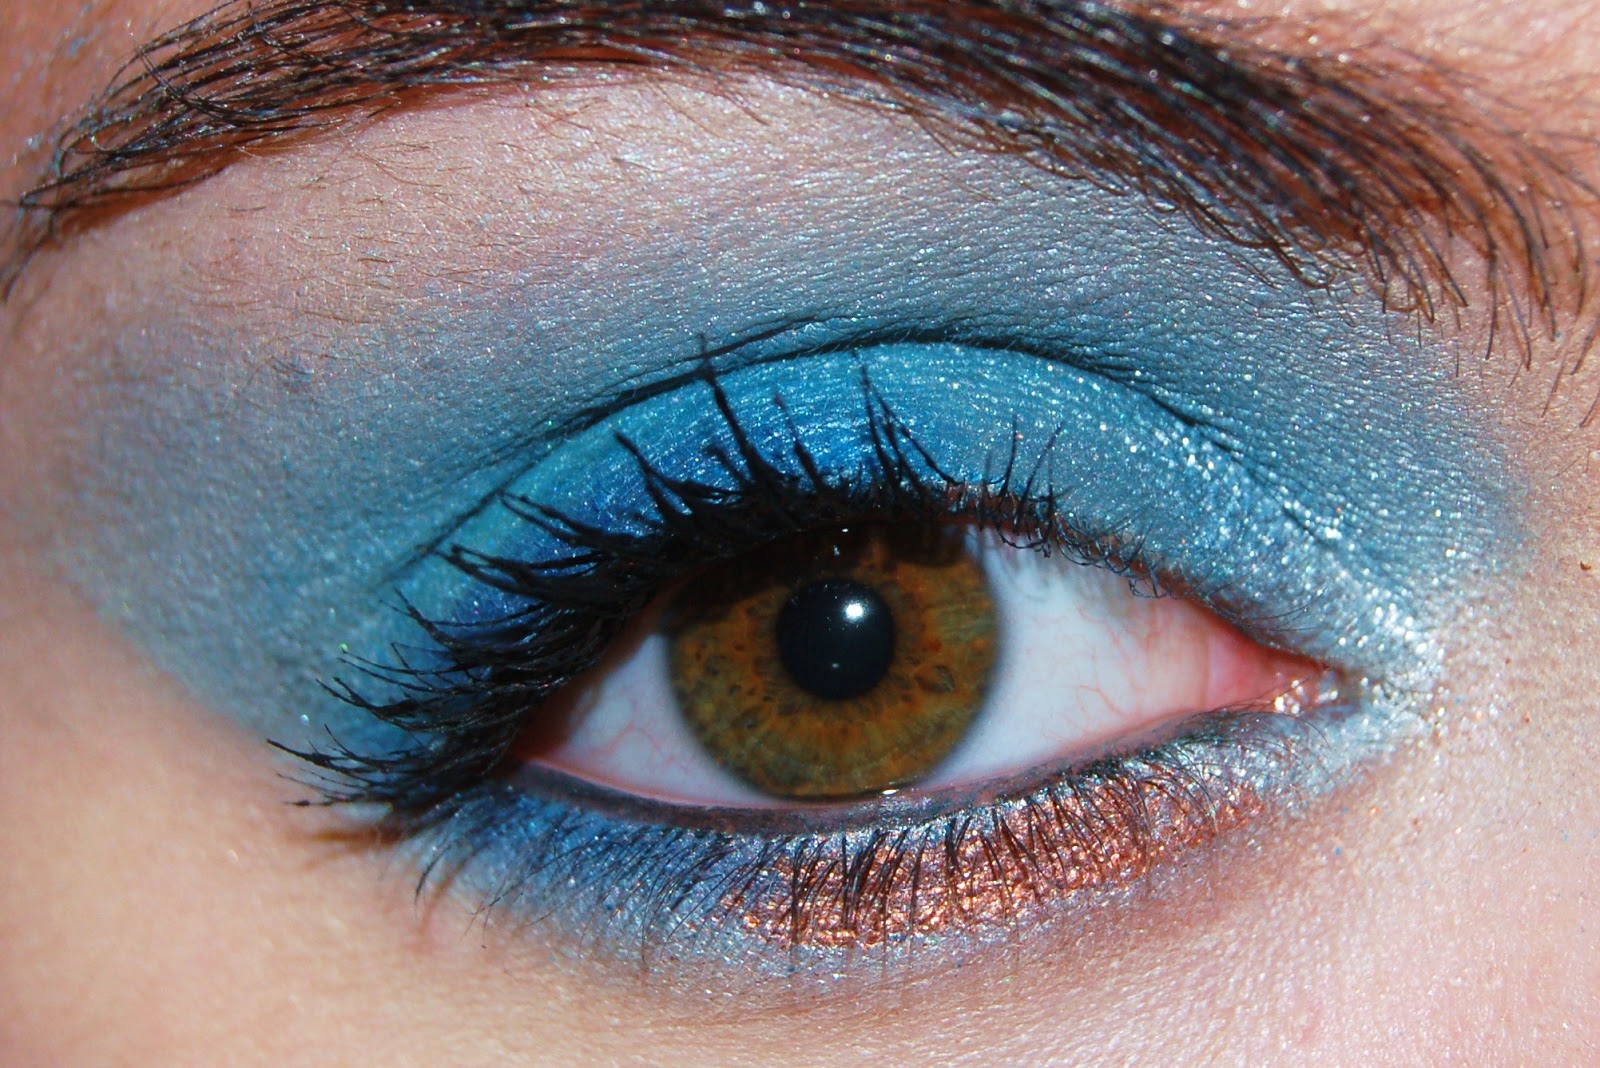
Neon blue shabang!!

Here is a list of the products used:
  • Photoready Concealer - Revlon 
  • Sparkle sauce mixing medium - POP
  • Icicle eyeshadow - First Cover 
  • Neon Blue powder eyeshadow - Models Own
  • Bayou eyeshadow - First cover 
  • Sapphire gel eyeliner - Avon 
  • Phenomena liquid metal - Illamasqua
  • Copper sparkle pigment - MAC
  • Black Khol eyeliner - Models own
  • Hypnose drama waterproof mascara in Black - Lancome 
So heres how I did it...

  • First you need to prime the eye - I just used my regular concealer, but urban decay or too faced have excellent eyeshadow primers that would work a treat here. 
  • Then I applied 'Icicle' a white eyeshadow to the whole lid and worked it up towards the brow bone. 

  • Then I used my mixing medium with the Neon blue powder eyeshadow to make a pigment and applied this to the lid. Staying away from the inner corner. I also applied a light line under my lower lashes. 


  • I then packed on more of the loose Neon blue powder and blended the colour towards my brow bone. 

  • To add some depth to the eye I applied a mix of Bayou ( a darker blue) and Sapphire gel eyeliner to the upper lash line, but only on the outer third of the eye, I also used this on the lower lash line. 


  • I then added the two metallic highlights, a silver - for which I used Phenomena liquid metal in the inner corner of the eye, blending it into the rest of the lid making sure to take it up towards the brows. And for the lower lash line I used Copper Sparkle (this has to be used with a mixing medium) to the inner third of the lower lash line. 


  • After the copper has dried I blend the lower lash line, otherwise the copper would be in the limelight more than I wanted it to be. Then to finish the look I apply black khol to the lower and upper waterlines and apply one coat of mascara...and there we have it!
The finished product!!
So there we are, not as hard as you think, and really you could use this look/ technique for any bold colour, just as long you remember to blend and add depth. 

If any one out there would like to see some more blue looks then don't hesitate to either comment below or message me and I will do my best to get more up here. 

As always let me know what you think :) 

X


Monday, 1 August 2011

Illamasqua eye pigment and liquid metal

Hi guys, sorry its been a while, Ive been so busy with work I havent really had time to sit down and write, even my book has been put on the back burner.
For those of you who follow me on twitter (@1brushbeauty) then you will know that I recently went to an Illamasqua store and purchased a couple of products.
For those of us here in the UK, there are very few Illamasqua counters around, I found one in a mall around 30miles from where I live. I took my mum who had never heard of the company before, but as soon as she saw the pigment counter she almost hyperventilated with excitement (yes the make up obsession must run in the family).

I chose the pure pigment in 'Ore' and the liquid metal in 'Phenomena' with the mind to use the liquid metal as a base and the pigment as a primary shadow colour.
Ore is a gorgeous golden brown, but unique to this shade, it has a certain something that you cant exactly explain. But I had never seen another product with this exact shade. Most of the pure pigments contain some glitter, but it is fine enough that you can wear it during the day.
Phenomena is the lightest silver liquid metal and is a silky cream pigment that is really dense with colour but has a lovely light silky application. It is a really cool shade that may appear to be a little daunting, but there is no reason that it would not suit all skin tones.

I wanted to give these products a chance before I reviewed them, as I find with some high end pigments all you pay for is the name and the product ends up being the same as a cheaper drugstore product.

I have been using phenomena the most out of the two products and I find its a wonderful highlight for the eyes (when used on the inner corners), it is such a universal colour that you can wear it with any eyeshadow look. I apply with my finger tips as this ensures the best products transfer and allows maximum control of the cream. The only negative I have to warn with this is that if you wear it all over your lids beware of creasing (although I dont really mind it creasing, and as it happens a glossy 'creased' eye is what many of the fashion show models have been sporting this season). The liquid metals make really good bases and add a subtle shimmer when applied lightly or a mind blowing intense molten look when applied liberally.

The pure pigment that I purchased was ore and this is a loose pigment powder. You can apply with a brush on its own which gives a light glow/sparkle but this method maximises fallout so be careful when applying to 'pat' the product in and not 'sweep' with your brush as you normally would. I have been wearing it with a mixing medium to wear as a crease colour and it works wonderfully. It has that golden tinge but can bring lovely warm olive tones out in your make up too. A great way to wear this is over a liquid metal, and this is slowly becoming one of my favorite day time looks.

All in all I highly recommend checking out Illamasqua, either at a counter or online, and products are really as they appear, they apply as the same colour as you see them (which is sometimes the most important thing). They are a little pricey however but, the liquid metals especially, are second to none, there is no product like them on the market.

As always if you have any questions or comments please leave them and I will try and respond accordingly. Please check out my twitter page and let me know if youve been reading my blogs, I would love to hear from you!

Thanks for reading, and until next time
TTFN
C